Delta – Electronics and Power supply
Let us Duet in this post! Electronic control board is the heart of a 3d printer. It controls all the stepper motors (axis and extruder), heaters, endstops, fans, temperature, z-probe and auto calibration. I have used only one board for my build and that is Duet3D’s control board with Reprap firmware.

The board has made configuring your printer so easy with few lines of G-code. You can change the configuration instantly. The documentation is fantastic and an amazing community support. I can keep on writing about the advantages of this board, but I will better direct you their website, documentation and their forum for you to explore.
Another main reason for duet is their auto calibration routine for delta printers. It is so fast and accurate. It documents clearly the issues affecting the calibration of delta printer and how to correct them. I strongly suggest anyone interested in building a delta printer to consult this page before even start building.
In this post, I will talk about some crimping tools I used for wiring that could simplify the process much better. I used the following tool crimping JST connector (Duet board connectors). Here is the amazon UK link for this product.
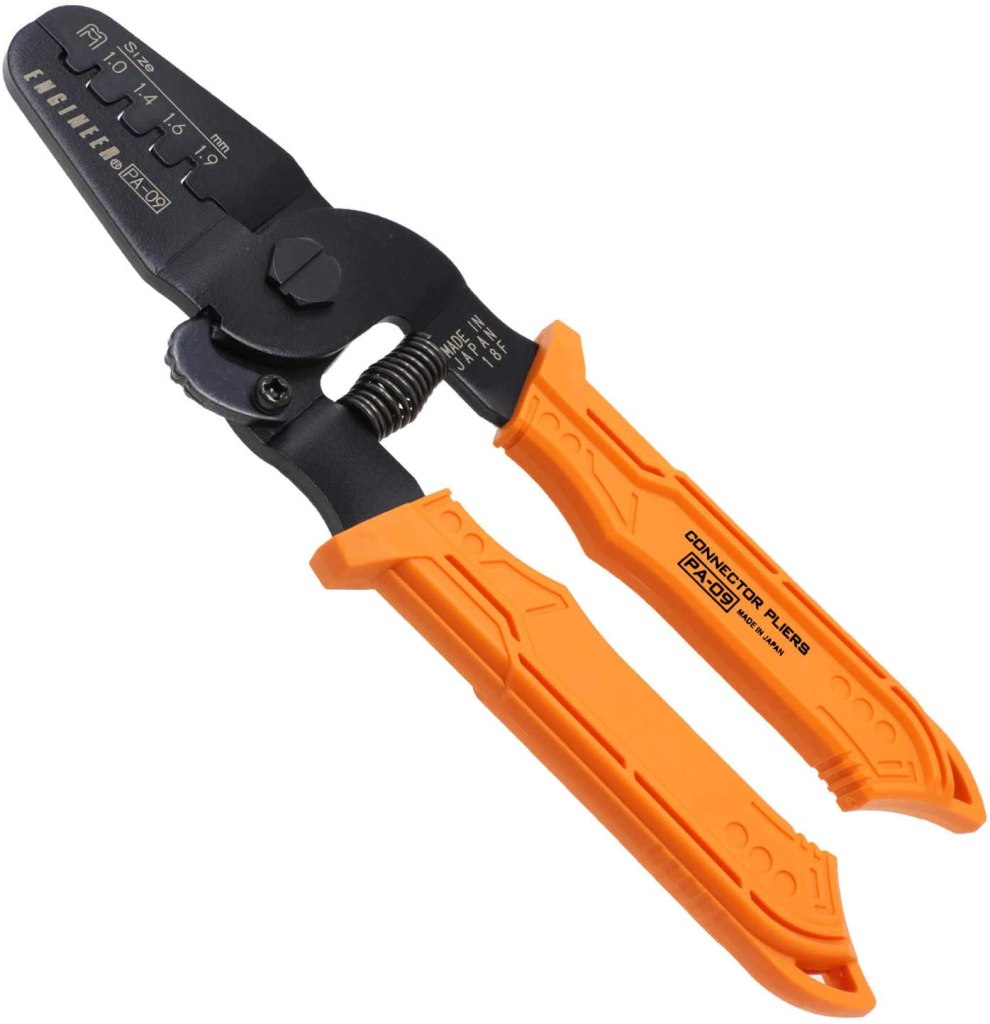
Another tool I used for crimping dupont connectors is IWISS crimping tool given below. Fans and thermistors come with dupont connectors. I used dupont male/female pins depending on the part and connect the wires to JST connectors for duet board. For most of these parts, I used 24AWG wires similar to this. The amazon UK link for crimping tool is provided.

For crimping ferrules (connecting heaters and mains board to duet controller), I used the IWIS ferrule crimping tool. The amazon UK link is also provided.

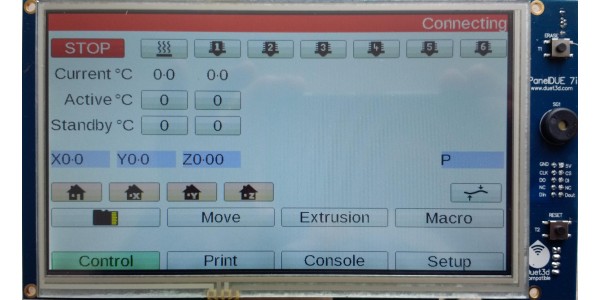
After connecting the components, I used paneldue 7 inch touch display to view the print status and control some print parameters like print speed, temperature and fan control. Paneldue 7 inch is again from Duet3D company. You can view the documentation in their website.
For power supply, I used a chinese power supply – 24V 600W from good quality 3d printing shop in your country. It looks similar to this picture.

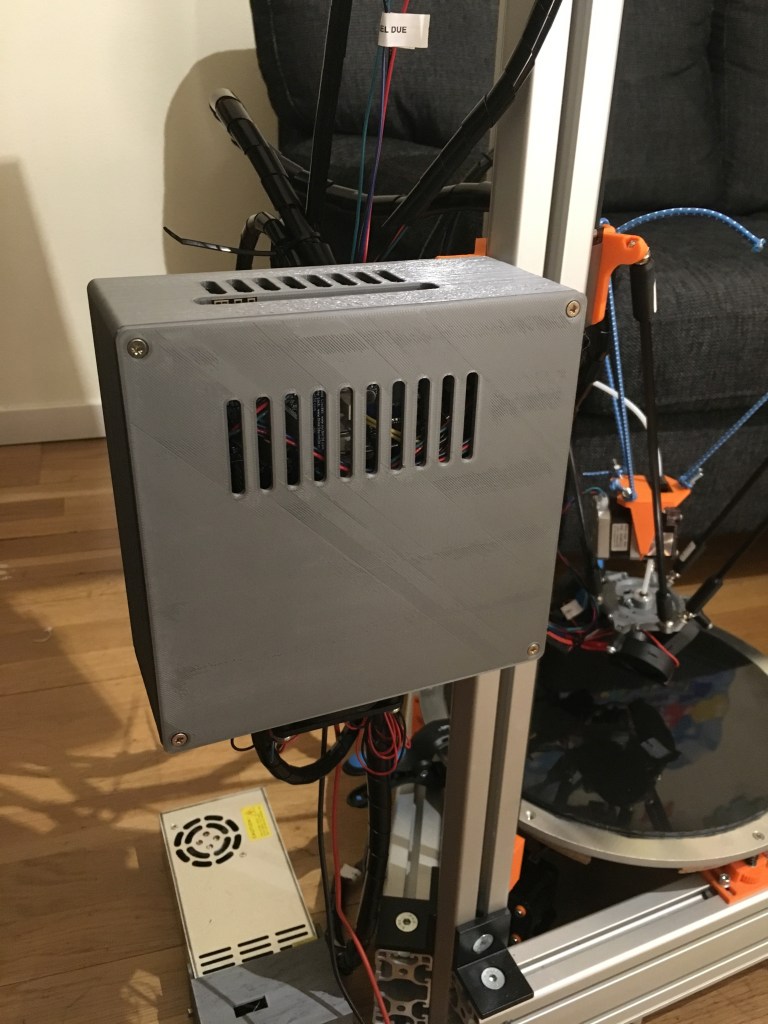
I have used various enclosures for these components from Thingiverse. Here are the links and some description:
- For Duet Wifi, I used this Thingiverse thing – I selected the option Duetwifi and DueX5 with 60mm external fan.
- I used a printed angled bracket to attach the printed Enclosure for Wifi box to the left tower.
- I used DC42’s Thingiverse thing for paneldue enclosure
- I used a printed angle bracket to attach the paneldue display along with enclosure to the front horizontal extrusions (either bottom or top, depending on your convenience)
- For power supply, I used this housing and switch described on thingiverse page to connect the switch to AC mains
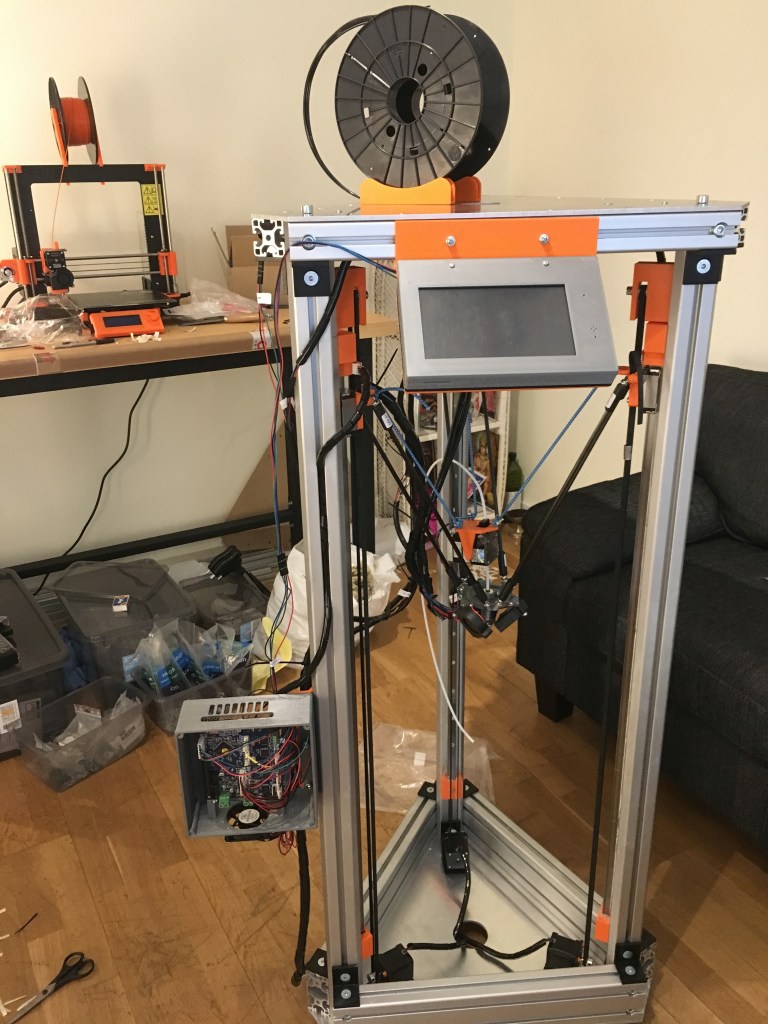
Finally, on a printer this is how it looks.